Installing Planning Analytics Workspace on RHEL 8.5
1. Introduction
With 30 April 2023 almost upon us and the end of free access to the Mirantis Runtime Engine, those who would like to deploy Planning Analytics Workspace (PAW) on Windows or have done so and require support updates will need to purchase a subscription.
An alternative to Windows is to run Planning Analytics Workspace on Red Hat Enterprise Linux (RHEL). RHEL also requires a support subscription for the operating system and updates but pricing may be more favourable. RHEL uses Podman which can be pulled from the RHEL repositories.
This article takes you through the installation of PAW on RHEL step-by-step. Very little Linux knowledge is required and all the commands should be available in the steps below to easily guide you through your first installation.
At a high-level, these are the steps we will follow:
- Install and configure RHEL
- Install and configure Podman
- Install and configure PAW
- Log in and test PAW
See this announcement from IBM for further details on the Mirantis Runtime Container:
2. Prerequisites and Assumptions
2.1. TM1 database
I will assume you already have at least one TM1 database running and configured for PAW to use as the default instance for login authentication. Also, it is assumed that you have added an entry into the TM1s.cfg for the HTTP Port Number that PAW requires for SSL communication with the model e.g.
					HTTPPortNumber=32768

UseSSL=T
2.2. Telnet / SSH client
I will be using MobaXterm to SSH to my server – https://mobaxterm.mobatek.net/
You could use any other SSH client e.g. Putty to connect too.
For any commands issued, I am assuming that I am not logged in as root but have an account to allow me to run commands as root through sudo.
For editing files, I typically use VI but you can use Nano which may be easier for those without VI experience.
3. Install and Configure RHEL 8.5
3.1. Register Developer Account and Download RHEL
Have your RHEL subscription details available or sign up with a trial or developer account depending on your circumstances:
https://developers.redhat.com/content-gateway/link/3871363
Download the relevant install from:
https://developers.redhat.com/products/rhel/download#assembly-field-downloads-page-content-61451
I have the RHEL 8.5 DVD ISO and have already installed my base RHEL OS from that.
3.2. Install RHEL
Install RHEL to your server/VM. My VM has 127GB disk, 16GB RAM. This should be sufficient for a development environment. Follow the installation prompts and after restarting, accept licensing etc. then RHEL should reboot.
After reboot I enabled my wired connection and updated my network settings, then set my IP address to static on 192.168.0.206 and to automatically connect.
Log in on the X Windows System then go to
Do something similar on your server based on your network and its IP range. Keep a note of the IP address for later.
As I am going to be using my own account with sudo, I will need to add my account to the sudoers. You will need to edit this file as root before you can sudo. Open the terminal window or connect using your telnet/SSH client.
					su –

vi /etc/sudoers

or

nano /etc/sudoers
Scroll down to the section with root (or %wheel) and add in an entry for your user or group as applicable. I am adding my account below root to allow my user to sudo e.g.
<username> ALL=(ALL) ALL
To insert into VI, you need to press lower-case i then type or paste. Once you have entered text, press escape to come out of edit mode.
Save and exit – file may be read-only so use the override per below to save:
:wq!
In VI, the above forces a save then quits.
Some other useful keys are below:
					i - insert text before the cursor

a - append text after the cursor

A - append text at the end of the current line

o - open a new line below the current line and insert text

O - open a new line above the current line and insert text

x - delete the character under the cursor

dd - delete the current line

yy - yank (copy) the current line

p - paste the last yanked (copied) text

:w - write (save) the file

:q - quit vi

:wq - write (save) and quit vi

ESC – exit entry mode

/<string> - Find a string in the file
More commands can be found in through this link:
https://www.cse.scu.edu/~yfang/coen11/vi-CheatSheet.pdf
4. Install and Configure Podman
4.1. Create your Podman and PAW directory structure
I like to create a directory off the root called paw and then have my current version as a sub-directory e.g. paw284
I also configure Podman to write the necessary files here as I have had instances where the filesystem where the default containers are stored is too small to house them or even extract the PAW images. In some cases IT provide an encrypted filesystem where all files need to reside so I typically create the containers directory and pawtmp directory here too.
					/paw

├── containers

├── paw284

└── pawtmp
Switch to superuser so that you can create directories and issue other commands:
					su -

cd /

sudo mkdir paw

sudo mkdir paw/pawtmp

sudo mkdir paw/paw284

sudo mkdir paw/containers

sudo mkdir paw/containers/storage
To view the structure you created, you can issue the tree command
tree /paw
4.2. Install and Configure Podman
Update all your repositories. First su to root if not already there.
					su -

yum makecache
Once cache has been created, update from it. This can take a few minutes depending on the number of updates.
yum update
Once updated, clean the cache
yum clean all
Install Podman ahead of PAW to be able to configure or change any required settings.
yum install -y podman
You should see something like the below if any updates are needed but previous step should have done this already:
					Updating Subscription Management repositories.

…

Upgraded:

  podman-2:4.2.0-11.el9_1.x86_64                    podman-catatonit-2:4.2.0-11.el9_1.x86_64
Create or edit the Podman configuration files:
vi /etc/containers/containers.conf
Add the following content or update as necessary
					[engine]

env=["TMPDIR=/paw/pawtmp"]
Update the storage.conf to set the new container storage location
vi /etc/containers/storage.conf
Locate and update the graphroot directory:
graphroot="/paw/containers/storage"
These two changes are particularly useful when you have additional filesystems that you want to use for your containers or possibly a very small tmp filesystem that fills when extracting the containers.
Per the notes in the storage.conf file, run these two commands to update Podman with the settings that have changed and relink to the new container path if SELinux is enabled:
					sudo semanage fcontext -a -e /var/lib/containers/storage /paw/containers/storage

sudo restorecon -R -v /paw/containers/storage
Enable the Podman service and start it.
systemctl enable --now podman.socket
You should see a message confirming that a symlink has been created:
Created symlink /etc/systemd/system/sockets.target.wants/podman.socket → /usr/lib/systemd/system/podman.socket.
Test that Podman is installed and running
podman run hello-world
You should see the following returned indicating the Podman is configured and running:
					Resolved "hello-world" as an alias (/etc/containers/registries.conf.d/000-shortnames.conf)

Trying to pull quay.io/podman/hello:latest...

Getting image source signatures

Copying blob 51c95f5eac86 done

Copying config aa20ddcead done

Writing manifest to image destination

Storing signatures

!... Hello Podman World ...!


         .--"--.

       / -     - \

      / (O)   (O) \

   ~~~| -=(,Y,)=- |

    .---. /`  \   |~~

 ~/  o  o \~~~~.----. ~~

  | =(X)= |~  / (O (O) \

   ~~~~~~~  ~| =(Y_)=-  |

  ~~~~    ~~~|   U      |~~


Project:   https://github.com/containers/podman

Website:   https://podman.io

Documents: https://docs.podman.io

Twitter:   @Podman_io
Also, if you look in the /paw/containers/storage directory, you should now see some files and directories that have been created:
					ls -l /paw/containers/storage/

total 12

-rw-r--r--. 1 root root    8 Mar 12 14:18 defaultNetworkBackend

drwx------. 2 root root   27 Mar 12 14:18 libpod

drwx------. 2 root root    6 Mar 12 14:18 mounts

drwx------. 5 root root 4096 Mar 12 14:18 overlay

drwx------. 3 root root  124 Mar 12 14:18 overlay-containers

drwx------. 3 root root  116 Mar 12 14:18 overlay-images

drwx------. 2 root root  129 Mar 12 14:18 overlay-layers

-rw-r--r--. 1 root root   64 Mar 12 14:18 storage.lock

drwx------. 2 root root    6 Mar 12 14:18 tmp

-rw-r--r--. 1 root root    0 Mar 12 14:18 userns.lock
You can exit root by typing in exit and returning to your user account.
4.3. Configure Directory Permissions
Depending on how you want to control access to the various directories, you may want to consider adding a group that has access to the PAW directories and is allowed to managed files, logs etc.
To keep things simple for now, I am going to leave ownership on root only and permissions to /paw as:
drwxr-xr-x. 5 root root 52 Mar 19 08:20 paw
5. Planning Analytics Workspace Installation
5.1. Download PAW from Fix Central
If you do not already have a copy of the latest version of Planning Analytics Workspace, follow the link below to download from Fix Central:
The file you are looking for should be named similarly to:
ipa_workspace_local_2.0.84.922.zip
There is also a ipa_workspace_local_dist_2.0.84.922.zip – Distributed is for deployment to Red Hat OpenShift Container platforms. See the following link for additional details as I will not be covering that type of installation here:
5.2. Copy the Install Files to the Server
For the PAW installation, I am assuming you are running as user account not root or superuser. All commands will thus use sudo to execute them.
If you are running as root or superuser, you can drop the sudo directive from each command.
Once downloaded, copy over the installation archive to your PAW server’s /paw/paw284 folder. If you are using MobaXterm, you can simply drag the file from your file explorer to your home directory and move it into the PAW directory.
					cd /paw/paw284

sudo mv /home/george/ipa_workspace_local_2.0.84.922.zip .
Change to the PAW folder if you skipped the step above and unzip the archive to extract the files and directories for PAW:
					cd /paw/paw284

sudo unzip ipa_workspace_local_2.0.84.922.zip

Archive:  ipa_workspace_local_2.0.84.922.zip

   creating: config/

   creating: config/certs/

  inflating: config/certs/applixca.pem

  inflating: config/certs/ibmtm1.pem

  inflating: config/certs/tm1ca_v2.pem

  inflating: config/README_certs.txt

  inflating: config/pa-workspace.pem

  inflating: config/paw.env.sample

  inflating: config/network.static.yml

  inflating: config/network.yml

  inflating: config/podman-docker.env

  inflating: config/defaults.env

  inflating: config/version.env

   creating: images/

  inflating: images/images.env

  inflating: images/images.tar

…
Once extracted you can confirm that the relevant files and directories have been extracted:
					ls -l

total 2298196

drwxr-xr-x.  3 root   root         4096 Feb 25 00:14 config

drwxr-xr-x.  2 root   root           42 Feb 25 00:19 images

-rw-rw-r--.  1 george george 2353322271 Mar 12 14:42 ipa_workspace_local_2.0.84.922.zip

drwxr-xr-x.  2 root   root         4096 Feb 25 00:14 licenses

-rwxr-xr-x.  1 root   root          202 Feb 25 00:14 README.txt

drwxr-xr-x.  2 root   root         4096 Feb 25 00:14 scripts

drwxr-xr-x. 23 root   root         4096 Feb 25 00:14 services

drwxr-xr-x.  2 root   root           62 Feb 25 00:14 software

-rwxr-xr-x.  1 root   root         1208 Feb 25 00:14 Start.bat

-rwxr-xr-x.  1 root   root         2343 Feb 25 00:14 Start.sh

drwxr-xr-x.  2 root   root           68 Feb 25 00:14 swidtag
I typically remove the zip file after extraction as it is no longer required:
sudo rm ipa_workspace_local_2.0.84.922.zip
5.3. Execute the Installation
The Start.sh script is used to start the installation or the Admin Tool. Before we run the installation we need to export a variable called ADMINTOOL_IP. The IP address exported should not be the address of the server on the network, not the local loopback on 127.0.0.1 as that will not allow you to connect from you browser, only through the browser in the X Window System if installed.
Use the following to find the server IP address bound to the ethernet adapter, eth0:
sudo ifconfig
In my case this is 192.168.0.206 so I will execute the following to set the ADIMNTOOL_IP and make it available in the root environment when the start script is executed.:
sudo -E bash -c 'export ADMINTOOL_IP=192.168.0.206; ./Start.sh'
If you do not specify the ADMINTOOL_IP, you will need to connect to the Admin Tool on a local browser i.e. the X Windows System. You will not be able to connect from another machine.
Specifying a different ADMINTOOL_IP after the installation could cause issues with connecting to the container due to network bindings and the IP address in the container.
5.4. Configure PAW Environment
Once the Admin Tool has started point your browser to the URL e.g http://192.168.0.206:8888
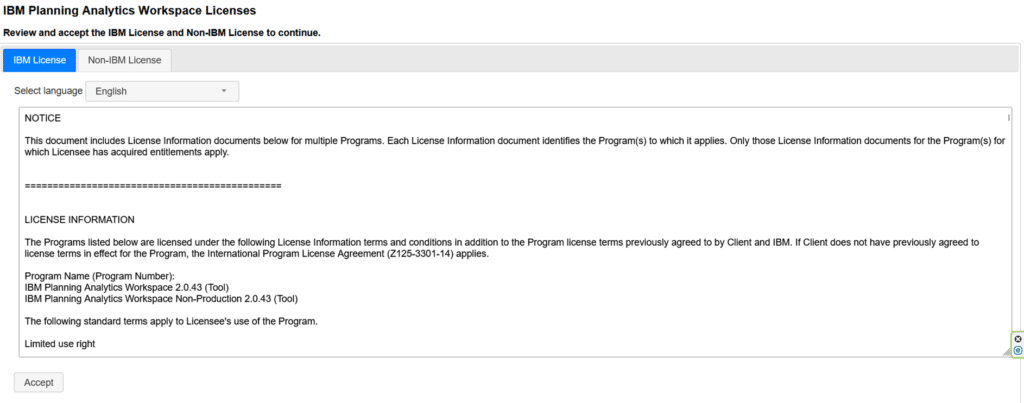
You will need to accept the license agreement on both tabs.
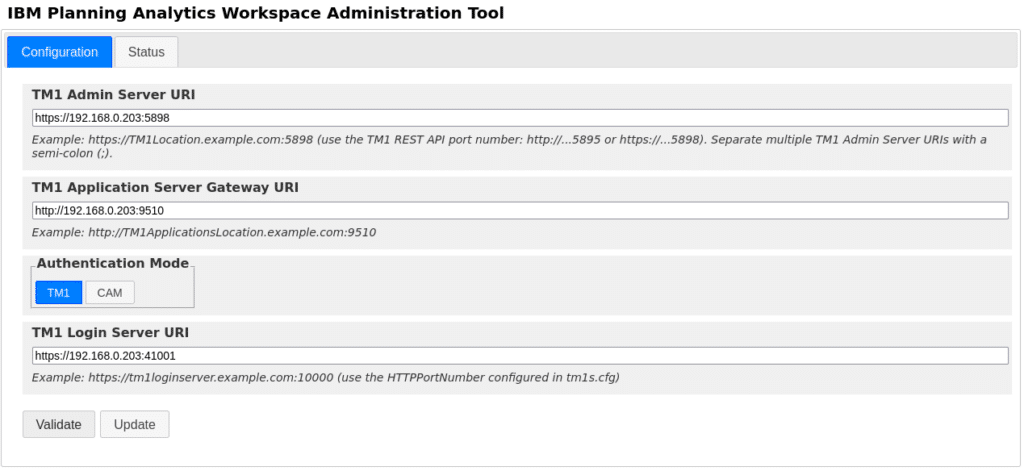
Update the Configuration tab with the details of your TM1 server.
TM1 Application Server Gateway URI will always return an error as it has been deprecated. I still configure as if it were going to connect with the pmpsvc or TM1Web.
TM1 Login Server URI require the HTTPPortNumber from the TM1s.cfg of the TM1 instance you want to use as the primary instance and will be used to authenticate against. Assuming for purposes of this document that we are using TM1 Authentication Mode. Please use a suitable TM1 database to connect to that has IntegratedSecurityMode=1 or 2 for native or mixed mode.
Click Validate to ensure that the Admin Server and TM1 Login Server are reachable.
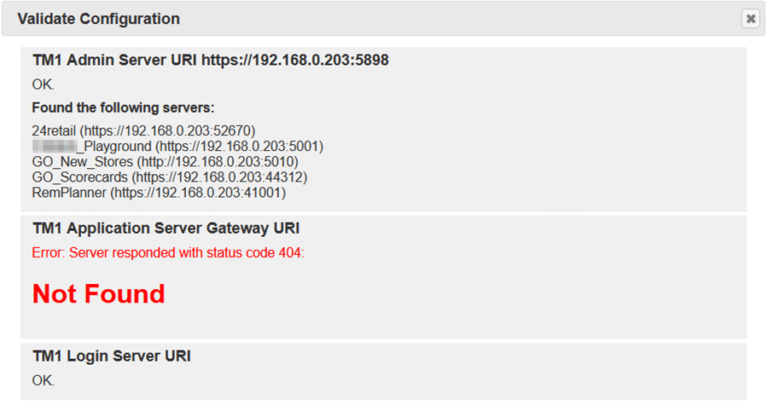
If they are not reachable, check your settings, ensure that you have UseSSL=T and the correct HTTPPortNumber
You can also use curl to check if the ports are reachable:
					sudo curl -k <server>:5898 --output test.txt

e.g. sudo curl -k 192.168.0.203:5898 --output test.txt

sudo curl -k <server>:<HTTPPortNumber> --output test.txt

e.g. sudo curl -k 192.168.0.203:41001 --output test.txt
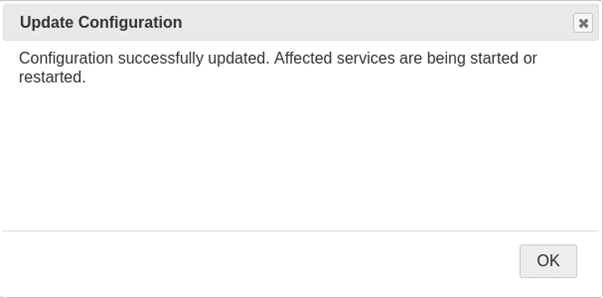
Assuming all is valid, you can then click on the Update button to start the PAW containers.
Navigate to the Status tab to monitor progress. Ideally you want to see that containers are in a running state.
Initialization should show as completed and will not be running.
Keep an eye on the CPU % as until these have settled down to very low values, the services are still loading and not ready.
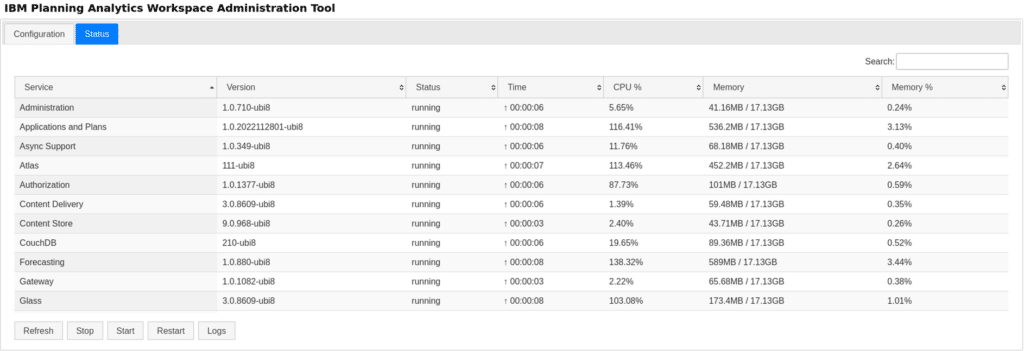
Any containers with a status of exited are not running and likely have some issue. You can click on the Service name then click Logs to retrieve and view the log. Alternatively, you can view the log in the command line using:
					sudo podman logs <service>

e.g. sudo podman logs atlas
If you are not sure if the correct name for the service, you can check these using the following:
sudo podman ps
This will also give you some information on each service.
If you want to monitor the containers as they start up or are running, you can use:
sudo podman stats
You should see view per below that is updated every 5 seconds:
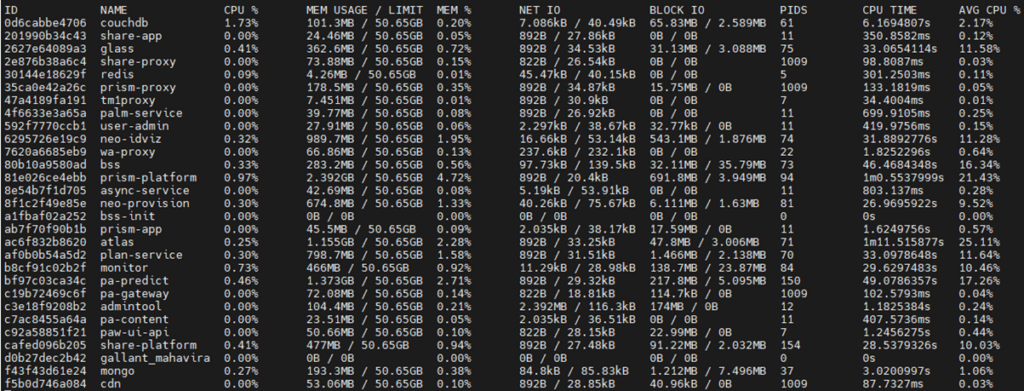
Ctrl+C to stop the stats display.
Refer to the following link and table below for Service names and descriptions:
https://www.ibm.com/support/pages/planning-analytics-workspace-services-and-associated-logs
Service | Folder name | Description |
Administration | user-admin | User administration service |
Authorization | bss | Manages accounts, tenants, users, roles, capabilities |
Chat | social | Chat service |
Content Delivery | cdn3p | Apache proxy serves up static files to browser clients |
Content Store | neo-idviz | PAW Content Store to store books, views, etc |
CouchDB | couchdb | CouchDB is a document-centric database used to store user chats |
CouchDB Initialization | couchdb_init | Initializes CouchDB |
Gateway | pa-gateway | Main Apache gateway into PAW |
Glass | glass | Manages components in the PAW UX |
Initialization | bss-init | Provides initial configuration of BSS |
MongoDB | mongo | MongoDB is a document-oriented database. Assets such as books and views are stored here |
Monitor | monitor | PAA Monitor |
PA Content Service | pa-content | Layer on top of the Workspace services that provides more efficient or advanced retrieval |
PA Proxy | wa-proxy | PAW proxy |
Provisioning | neo-provision | PAW Content Store configuration agent |
Redis | redis | Redis is an in-memory key/value store used by PAW to persist user settings, favorites and bookmarks |
Share Application | share-app | Share UX service |
Share Platform | share-platform | Share core service |
Share Proxy | share-proxy | Apache proxy in front of paw_share-app and paw_share-platform |
TM1 Proxy | tm1proxy | Used by PA for Excel to proxy requests to TM1 OData APIs |
Welcome | welcome | Welcome page service |
Workspace Application | prism-app | Dashboard service |
Workspace Platform | prism-platform | Query engine, modelling support and ancillary services |
Workspace Proxy | prism-proxy | Apache proxy in front of paw_prism-app and paw_prism-platform |
Workspace UI API | paw-ui-api | Supports embedding PAW UI components in other applications |
5.5. Logging in for the First Time
Point your browser to the IP Address of your server, per what we used in the ADMINTOOL_IP. If all services started correctly and have finished loading you should get a login screen.
Keep in mind that whoever logs in for the first time becomes the PAW administrator. If you are logging in as someone other than admin, you will want to create additional users and assign the necessary Admin privileges.
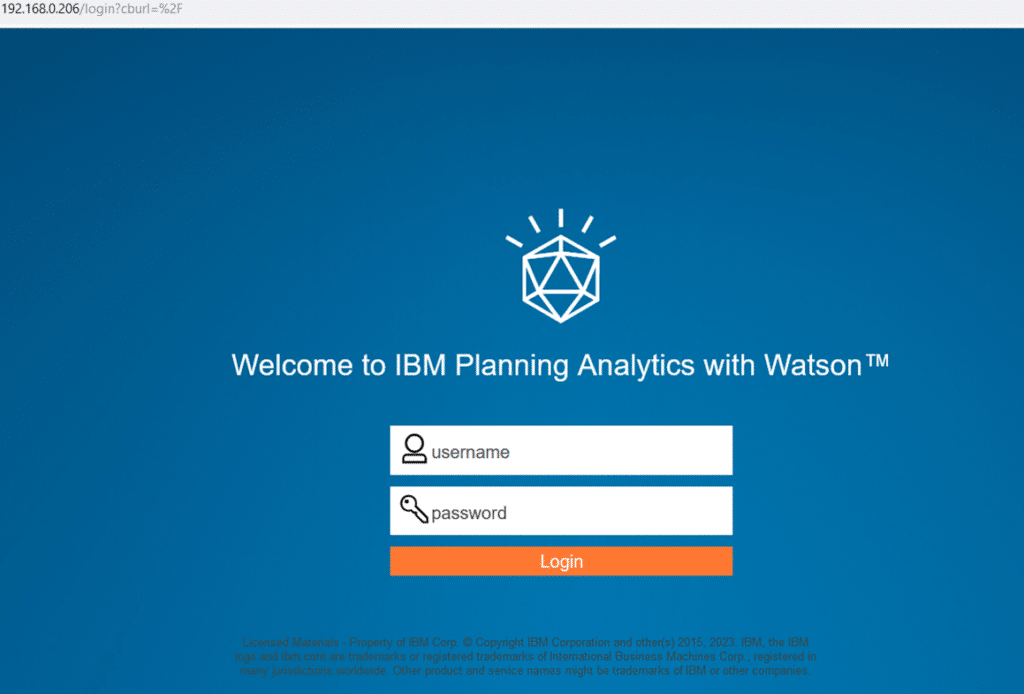
Once successfully logged in, you should see the home screen:
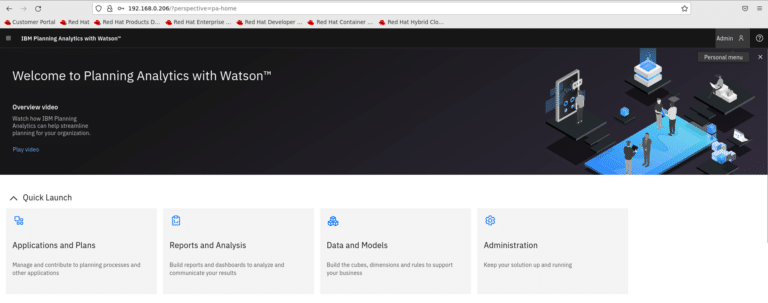
From here, you can click on the hamburger menu at the top left and navigate to Administration:
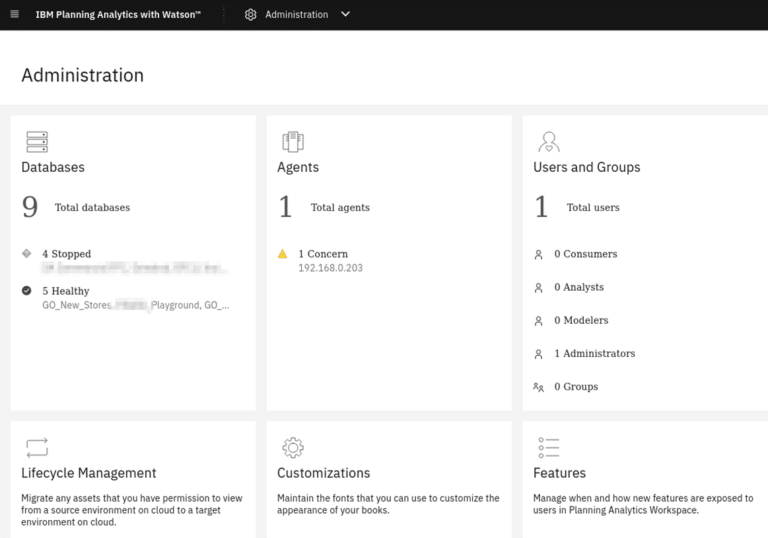
You should be able to see the databases on the server, agents and users and groups. At this stage obviously just the one user, you, assigned as an Administrator.
6. Controlling PAW
6.1. Starting PAW
https://www.ibm.com/support/pages/how-stop-and-start-planning-analytics-workspace-command-line
Scripts are located in the scripts directory of the PAW installation. In our case: /paw/paw284/scripts
Run the following to start PAW:
sudo ./paw.sh start
If PAW is running and you want to restart the containers, you can issue the following command:
sudo ./paw.sh restart
6.2. Stopping PAW
To stop the PAW containers you can issue the following command:
sudo ./paw.sh stop
6.3. Updating PAW Settings
PAW settings are located in the config directory i.e.
/paw/paw284/config
The default settings are configured in the defaults.env file. Any changes to these defaults should be added into the paw.env file which contains the settings we captured into the Administration Tool before starting the services.

For additional details see the Configure Parameters page:
https://www.ibm.com/docs/en/planning-analytics/2.0.0?topic=local-configure-parameters
7. Future Considerations
Now that PAW is configured and running, read up on making backups of PAW and the configuration in the containers, upgrading to new versions etc.
You could also look at configuring PAW with your own certificate. Ensure that it is not an encrypted PEM file though. IBM page is a bit thin on detail but will cover this in a future article if there is a need.
Additionally, you could look into configuring the Planning Analytics Administration agent and registering a SendGrid account to allow you to configure and send mail from PAW.
https://www.ibm.com/docs/en/planning-analytics/2.0.0?topic=icpaaalo-enable-email-notifications
8. Conclusion
I trust you were able to configure your RHEL server and load and configure PAW accordingly. and then log in.
Assuming all the steps above worked for you, you should be in a position to assess whether or not PAW on RHEL is a suitable and possibly better fit for your organisation. My personal findings indicate that PAW on RHEL is a lot faster than any of the Windows servers I had previously run it on.
As always, if you experience any issues with any of the steps, see mistakes or have a better way of doing things, please leave a comment so that I can correct issues or others can gain insight from your feedback.
9. Further Troubleshooting
View the Administration Tool log
sudo podman logs admintool
Test if you the Administration Tool is running if your browser is not connecting:
					curl -k <server>:8888

e.g. curl -k 192.168.0.203:8888
This should return the content of the page as text if the connection can be made. Firewalls could also be something to check where connections are not possible
Cannot connect to the Administration Tool on the specified IP address. Restart the Administration Tool as it may be bound to 127.0.0.1
sudo podman restart admintool
Review the link if you get the below error:
Error: can only create exec sessions on running containers: container state improper
sudo podman systemsudo podman system reset prune
After each reboot, some Planning Analytics Workspace containers are failing to start
All containers are in “Restarting” state on Linux, and logs are empty
Planning Analytics Workspace Services and Associated Logs
https://www.ibm.com/support/pages/planning-analytics-workspace-services-and-associated-logs
By George Tonkin, Business Partner at MCi.
